Connect your bank with Enable Banking — step by step
A plain-language, step-by-step guide to creating an Enable Banking application, generating your key pair, and connecting your bank so transactions import automatically.
You sign in at your own bank, never in Aega. The connection is read-only: it can list accounts and transactions, and it can never move money.
- 1
Create a free Enable Banking account
Go to enablebanking.com/sign-in. There is no password — the page just says "Sign in with email".Type your email address in the Email field and press Next. Enable Banking sends you a one-time sign-in link. Open your inbox (check the spam folder if it is not there within a minute) and click the link — it signs you straight in to the control panel.
If you have never used Enable Banking before, this same step also creates your account automatically; you do not need to register separately. Use the same email every time you sign in, and always open the link on the same device where you want to work.
Enable Banking is the licensed service that talks to the banks — Aega never sees your bank password.
- 2
Open "API applications" and start a new one
Once signed in you see a row of tabs at the top: API applications, ASPSP status, Data insights, Mock ASPSP, Billing and User profile.Click API applications, then choose Add a new application.
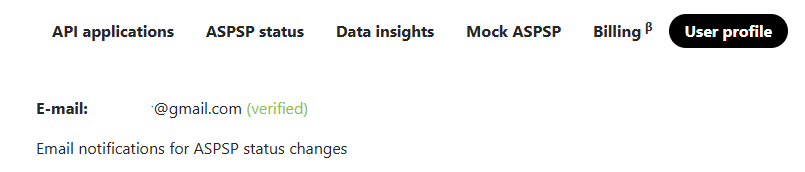
The tabs at the top of the Enable Banking control panel after signing in. - 3
Choose Production
Under "1. Choose your application's environment" press Production. Sandbox is only for testing with fake banks — pick it only if you want to try things out first without your real bank.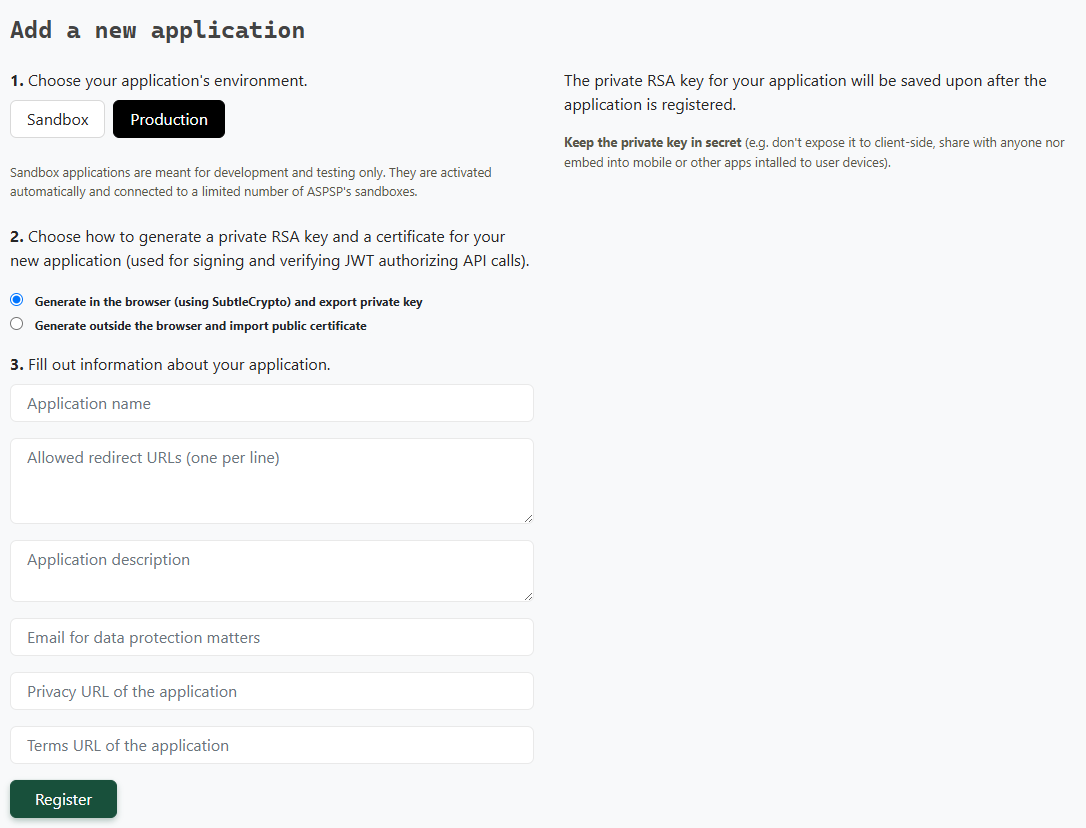
The 'Add a new application' page — steps 3 to 5 of this guide all happen here. - 4
Let the browser create the key for you
Under "2. Choose how to generate a private RSA key…" select the first option: Generate in the browser (using SubtleCrypto) and export private key.You do not need to understand what a key is — the page makes it for you and downloads a small file (ending in
.pemor.key), usually to your Downloads folder. Keep it safe and never share it; it works like a house key. You will paste what is inside it into Aega later.To open it later: right-click the file and choose Open with → TextEdit (Mac) or Open with → Notepad (Windows), select everything and copy it.
The other option, "Generate outside the browser and import public certificate", is only for advanced users who prefer to create the key themselves with
openssl. - 5
Fill out the application details
Under "3. Fill out information about your application":- Application name — anything you like, for example "Aega".
- Allowed redirect URLs — copy the exact URL Aega shows in Settings → Bank & backup → Bank connection. It looks like
https://your-site/api/public/bank-callback. It must match character for character, includinghttps://and no trailing slash. - Application description — optional, e.g. "Renovating control page".
- Email for data protection matters — your own email address.
- Privacy URL —
https://aega.se/privacy - Terms URL —
https://aega.se/terms
Press Register. The private key file is downloaded at this moment — save it.
- 6
Check the registered application and copy the Application ID
Your application now appears in the list marked Active, showing Environment: PRODUCTION, the service Account Information, your description, emails and the redirect URL you entered.Copy the Application ID shown next to the application name (also called
kid) — you paste it into Aega in the next step.Before leaving Enable Banking, open the Linked accounts section and link your bank account now. Choose your bank, complete the bank login (BankID in Sweden or your bank app elsewhere), and allow the connection. This gives Enable Banking permission to read your accounts. You will link the same account again inside Aega later so the transactions can be imported.
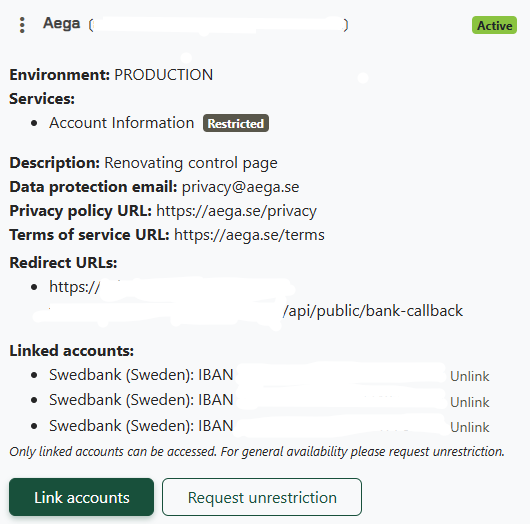
How your application looks once registered. Linked accounts appear after you link your bank here in Enable Banking. - 7
Fill in the form in Aega
Back in Aega, open Settings → Bank & backup and in the Bank connection card enter: environment, Application ID, the redirect URL, and paste everything from your key file (the one you downloaded or created in step 2), including the-----BEGIN…and-----END…lines, into the private key box. Turn on Enable bank connections and press Save settings. - 8
Test the connection
Press Test connection. Every check should turn green. If a check fails, the message tells you what to fix — usually a mistyped Application ID or a private key that was pasted with missing lines. - 9
Link your bank in Aega
Go to the Banks page in Aega, choose your country and bank, and complete the bank's own login (BankID in Sweden, or your bank's app elsewhere). Your accounts appear afterwards and transactions import automatically every night. This step connects the account you already linked in Enable Banking to your Aega household.
- "Invalid signature" — the private key in Aega does not match the public key uploaded to Enable Banking. Re-upload
enable-public.pemor paste the matchingenable.pem. - "Redirect URI mismatch" — the URL in Enable Banking must be character for character the one shown in Aega.
- Nothing imports — most banks only allow 90 days of access before you must re-approve. Reconnect from the Banks page.
- No
opensslon Windows? Install Git for Windows and use "Git Bash", which includes it.